Recreate shared workspaces
You only need to follow the steps below if you have been nominated to recreate the shared workspaces in the nhs.net environment.
- Step 1: Login to https://app.powerbi.com in the nhs.net environment using your nhs.net account.
- Step 2: Select ‘Workspaces’, then ‘New workspace’.

- Step 3: Enter the details of the new workspace, then select ‘Apply’.
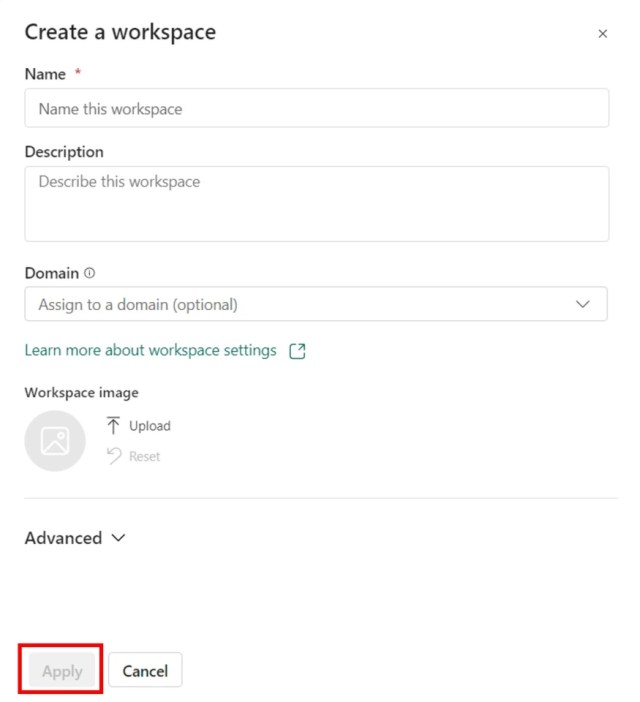
- Step 4: Once the workspace is created, select ‘Manage access’, then ‘Add people or groups’.

- Step 5: Type the name of the colleagues you would like to grant permissions to this workspace. Remember, this will use their nhs.net account. Ensure you select the drop-down arrow next to ‘Viewer’ to specify the correct permissions your colleague should have to this workspace. Once you have added all colleagues and assigned the correct permissions, select ‘Add’.

Import a Power BI Service report
Please note, for shared workspaces you at least must be a Contributor to the workspace to be able to import a .pbix file.
- Step 1: Login to https://app.powerbi.com in the nhs.net environment using your nhs.net account.
- Step 2: Select the desired workspace (personal/shared).

- Step 3: In the top pane, select ‘Upload’, then select the upload location – e.g., ‘OneDrive for Business’, ‘SharePoint’, or ‘Browse’.
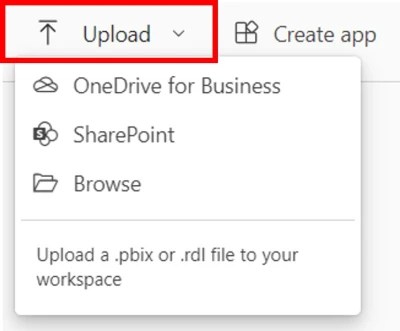
- Step 4: Locate the .pbix file and select ‘Open’. Once the import has been completed, you will see the report listed on your screen.

- Step 6: Repeat these steps for all workspaces and reports required.